The ‘classic’ view of Tulach Mor from the south, with the River Thurso to its left.
Image credit: Les Hamilton
The ‘classic’ view of Tulach Mor from the south, with the River Thurso to its left.

From the north, Tulach Mor shows just this grass covered dome.

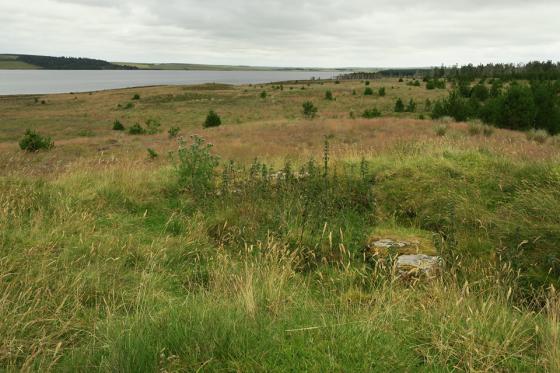
To the east of Tulach Mor sits this rubble pile.

The southwest aspect of Tulach Mor showing the remaining external walling courses.

A close-up view of the main exposed walling courses on the southwest of Tulach Mor.

Some exposed remnant internal walling shows at the top of the broch wall to the north of the structure.

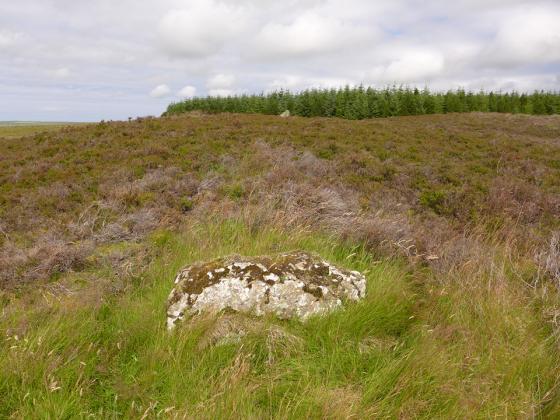
View across the saucer shaped summit of Tulach Mor, which is mainly grassy with just the odd stone peeking out here and there.

View across the shallow saucer-lihe summit of Tulach Mor.

On the inside western wall of Tulach Mor is this exposed lintel leading to an intermural cavity of some sort.

Interior detail beyond the exposed lintel, revealed with a flash exposure.
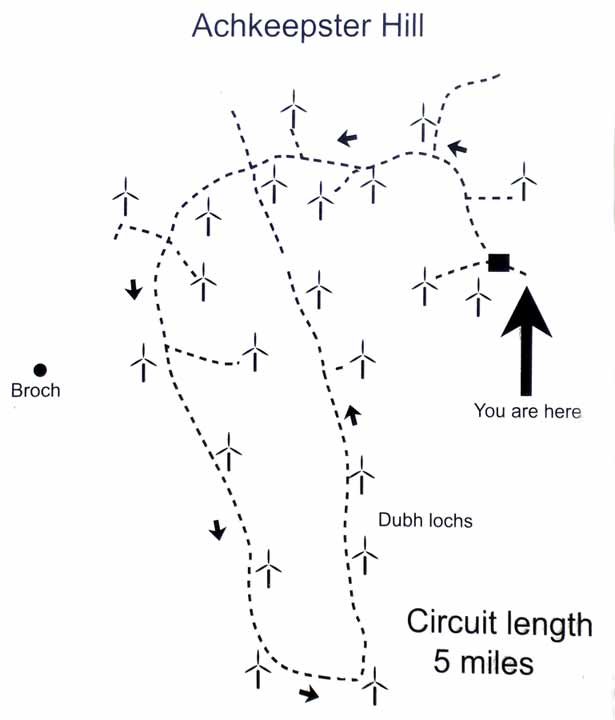
Photograph showing the map of the windfarm. This is located beside the cattle grid at the entrance to the Causeymire wind farm.
The broch illustrated on it is NOT Tulach Mor but the dilapidated Tulach Beag, which is located several hundred metres to the north of Tulach Mor.
Visited: June 23, 2021
Tulach Mor is the southernmost of the Westerdale brochs in Caithness, and stands adjacent to the River Thurso in the Causeymire Windfarm near Achkeepster. Unusually, perhaps, walkers are actively welcomed to explore the area of this windfarm. Access is via a good metalled road to the windfarm, to the west of the A9 and about 1½ kilometres south of Mybster.
Be aware that the much more expansive Halsary Windfarm lies immediately adjacent to and south of the Causeymire Windfarm (but is not at present shown on the OS map). Its spacious entrance is just a few hundred metres farther south. On my first visit to the area, I parked in the entrance to this windfarm and found the layout totally different to the windfarm shown on the OS map. If in doubt, look for the Map illustrated in the Artistic / Interpretive: section above. If you don’t see a sign bearing this map beside the cattle grid at the start of the road leading into the windfarm, you are in the wrong windfarm!
Route to Tulach Mor
The purple marker “P” indicates the parking area at the windfarm entrance (you are not permitted to drive your vehicle into the windfarm). The green markers show the locations of the Tulach Mor and Tulach Beag brochs. The southern one is your target, Tulach Mor.
The walk to Tulach Mor starts with a trek of around four kilometres along a wide roughly metalled road. Keep to this road (yellow trail on the map) and avoid turning off along any of the short turbine servicing roads. All the turbines are indicated by small white markers on the map, and the one where you set off cross-country to Tulach Mor is a larger white marker indicated “X”.
When you leave the road, you have a walk over a mixture of grass tussocks, heather and sphagnum (cyan line on map) for almost 600 metres, effectively due west. The main indicator to look out for is the River Thurso. Turbine “X”, is the first turbine from which you can actually see the river, so basically just make for it. The terrain is mixed, and the easiest stretches are the frequent grassy tongues. I visited in drought conditions, but I reckon the superabundant sphagnum could be a problem in wetter times. Almost at once, you should see the broch mound in the distance.
Tulach Mor is a prominent mound abutting the eastern river bank close to where the River Thurso dog-legs sharply towards the southwest. The broch stands on a rock with a steep face on the south and west and was originally protected by a ditch around its eastern side. On the east is a field of tumbled masonry, presumably the remains of a severely quarried wall that formerly crowned the ditch.
There’s not a great deal of walling remaining, except on the south and southwest, where several courses of neat blocks endure. For the rest, the structure is just a grass-covered dome with a saucer-shaped depression in its summit, characteristic of the filled-in court seen in many brochs. On the northern arc of the summit some stonework of the broch’s inner wall still protrudes while on its inner western wall is a lintelled breach leading to an intra-mural cavity.